Effective Graffiti Removal Techniques for Protected Murals
When it comes to maintaining the beauty of your mural while effectively removing graffiti, it's essential to use the right products and techniques. This guide provides step-by-step instructions for removing graffiti from murals protected by MuralShield™ and World's Best Graffiti Coating and ensuring your artwork remains vibrant.
Small Scale Graffiti "Tag" Removal Jobs
Step 1: Application of Graffiti Remover
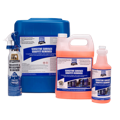
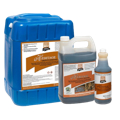
Use Sensitive Surface Graffiti Remover or Heritage Graffiti Remover with a solvent-rated brush. Gently agitate the graffiti with your brush as you apply the product to ensure thorough coverage.
Step 2: Wipe Away the Graffiti
After allowing the remover to work, wipe away the dissolved graffiti using a damp cloth. This will help prevent any residual marks from remaining on the mural.
Step 3: Rinse and Protect
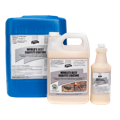
Once you are satisfied with the results, thoroughly rinse the affected area with clean water. Allow the surface to dry completely before reapplying two to three coats of World's Best Graffiti Coating using a spray, roller, or brush. This will provide ongoing protection against future graffiti.
Adam, Director of North American Operations, Demonstrates How to Remove Graffiti from a Protected Mural
Large Scale Graffiti Removal Jobs
If you're dealing with extensive graffiti, such as "bombs," heavy tagging, filled-in bubble writing, or murals that have been buffed or painted over, follow these steps for optimal results.
Step 1: Section Work
Divide the mural into manageable sections of 5-10 sq. ft. Apply Heritage Graffiti Remover using a pump-up sprayer, and agitate with a nylon brush or broom for effective penetration.
Step 2: Rinse with Pressure Washer
As the graffiti begins to dissolve, rinse the area with a pressure washer using a 25-degree tip. Maintain a distance of 6” - 12” from the mural surface to protect the acrylic paint layer while ensuring a thorough clean.
Step 3: Spot Clean Remaining Graffiti
For any residual graffiti, spot clean using Heritage Graffiti Remover or Sensitive Surface Graffiti Remover with a nylon bristle brush to effectively eliminate stubborn marks.
Step 4: Final Rinse
After all graffiti is removed, rinse the entire mural thoroughly with clean water. Wait 15-30 minutes for the surface to dry completely before proceeding.
Step 5: Reapply Protective Coating
Apply two coats of World's Best Graffiti Coating using a spray, roller, or brush. This step is crucial for maintaining the protective layer and enhancing the longevity of your mural.
GOLDEN TIPs
Removing graffiti from murals painted with acrylic-type paints requires a careful approach to preserve the artwork. Follow these steps for effective graffiti removal using Sensitive Surface Graffiti Remover (SSGR):
Conduct a Test Patch
Always start by testing a small, inconspicuous area of the mural to determine if SSGR will successfully remove the graffiti without damaging the paint. This initial test is crucial for assessing the compatibility of the remover with your specific mural.
Apply the Graffiti Remover
Once you've confirmed that SSGR is safe for your mural, brush it on and gently agitate the solution with a soft brush. Work in small sections at a time to ensure thorough coverage and effective dissolution of the graffiti.
Remove Dissolved Graffiti
After allowing the remover to penetrate the graffiti, wipe off the dissolved residue with a damp cloth. Alternatively, you can rinse the area carefully using a hand sprayer filled with clean water, followed by a damp cloth for an extra clean finish.
Act Quickly for Best Results
The sooner you address the graffiti, the better your chances of successful removal. If possible, aim to clean the graffiti within 72 hours of its occurrence. Timely action significantly increases the likelihood of restoring your mural to its original condition.
Expert Advice
Click on any of the icons below for more how-to's and advice


